Introduction
From a customer service perspective, it's crucial for any business to delegate incoming customer messages to the appropriate team or individual to ensure efficient and effective handling.
A workflow can be configured to trigger when a new message is received. And then by using the Auto Assignment action or Update Contact action, the message is automatically delegated to the appropriate and available team or member based on specific conditions.
Auto Assignment
This action automatically assigns users within a specific team to follow up on customer messages based on predefined rules. These rules are used to determine who should receive an incoming message.
They ensure that work is distributed fairly, accurately, and efficiently across users within the appropriate team.
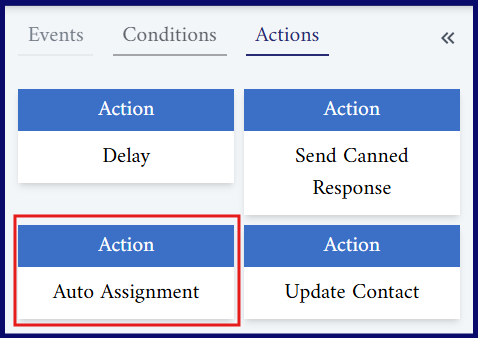
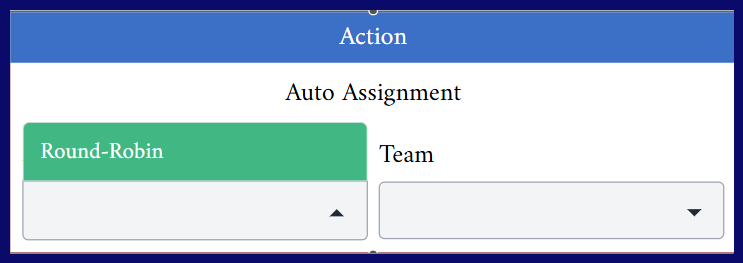
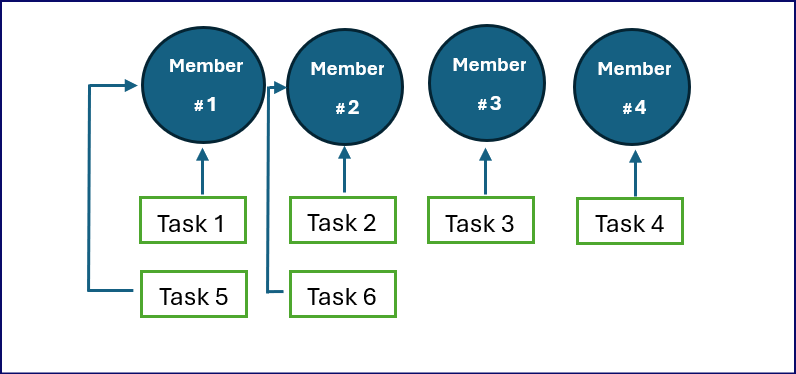
One of the popular methods for auto assignment is Round Robin method.
In this method, team members are assigned to follow up on customer messages in a circular, rotating order, as shown below:
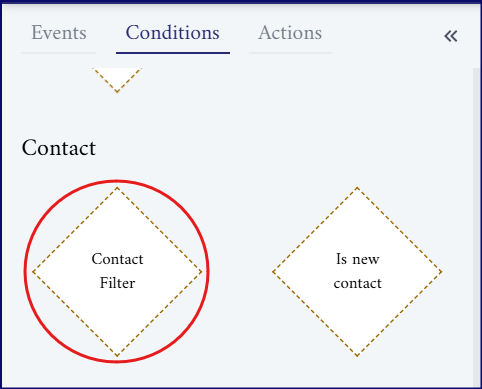
To avoid assigning a new user to a contact each time they send a message, use the Contact Filter condition in the workflow to check if the contact already has an assigned owner or not.
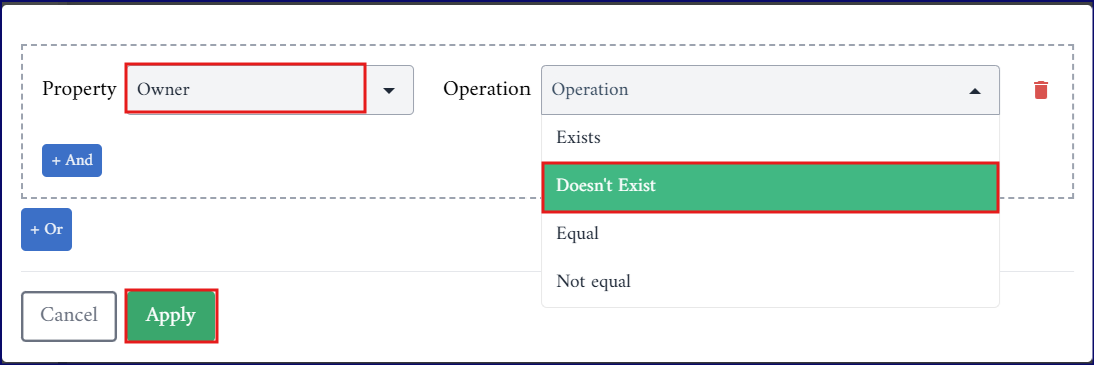
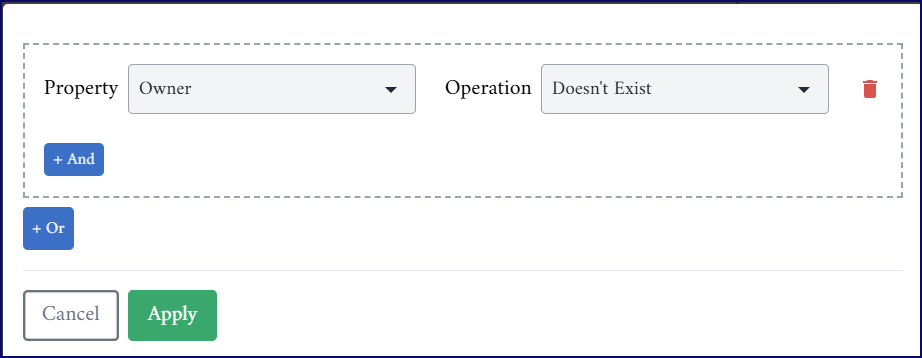
Within the Contact Filter condition:
- In the Property field, select Owner.
- In the Operation field, choose Doesn't exist.
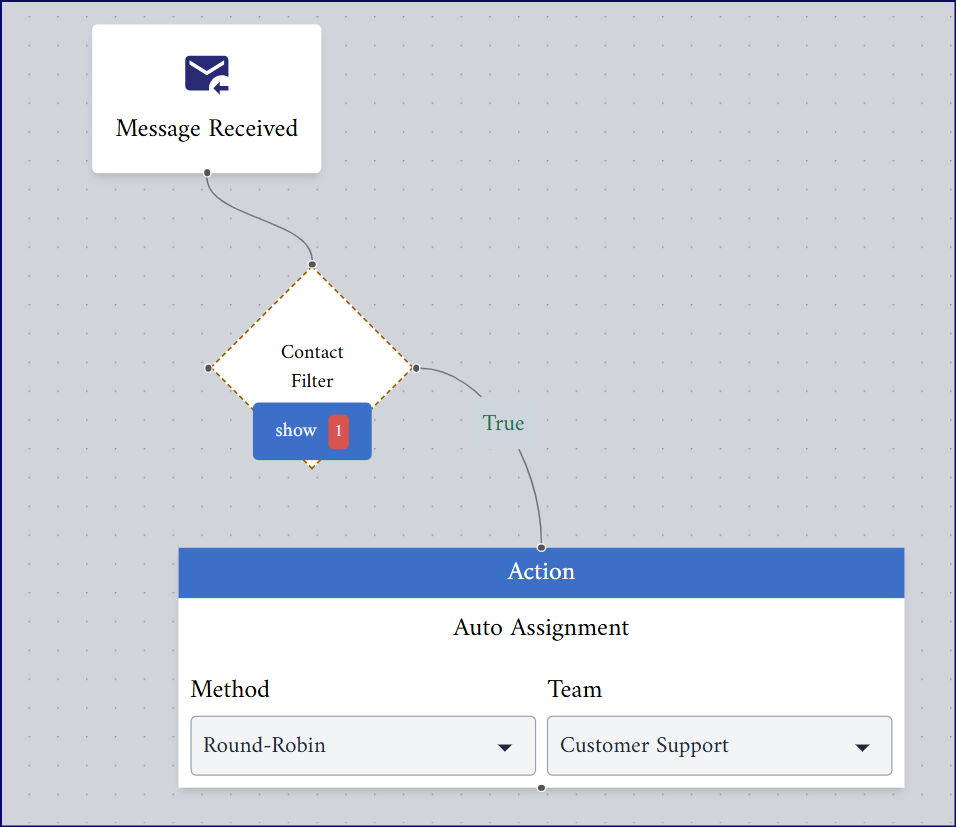
If no owner is assigned, use the Auto Assignment action to assign an appropriate user as shown in the workflow below:
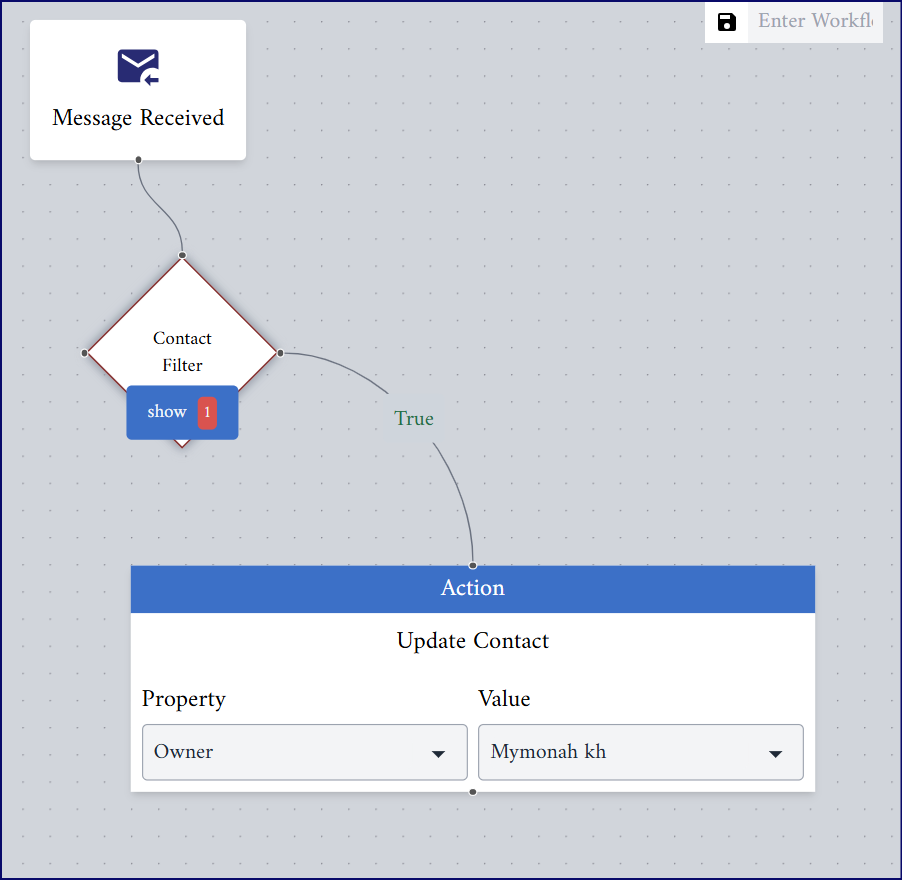
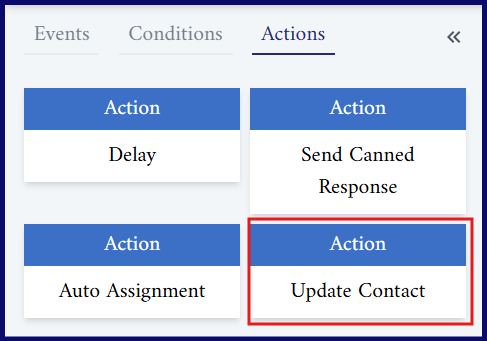
Update Contact
Case 1:
In some cases, you may need to assign the received message to all members of a relevant team at once, so that the first available team member can respond immediately.
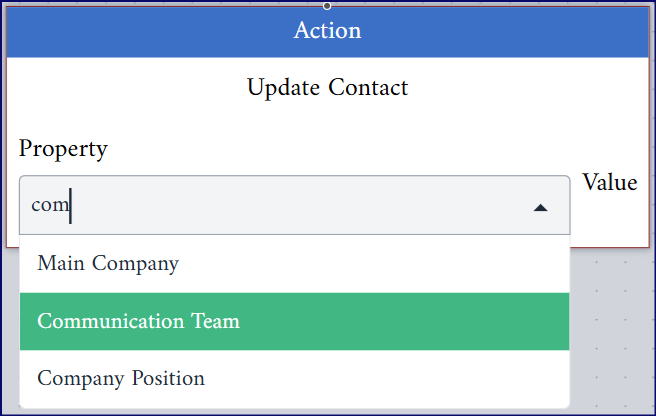
To do this, use the Update Contact action and assign the message to the appropriate communication team. This way, all team members will see the message, and the one who’s available first can take ownership and respond directly. This ensures faster handling, especially in time-sensitive situations.
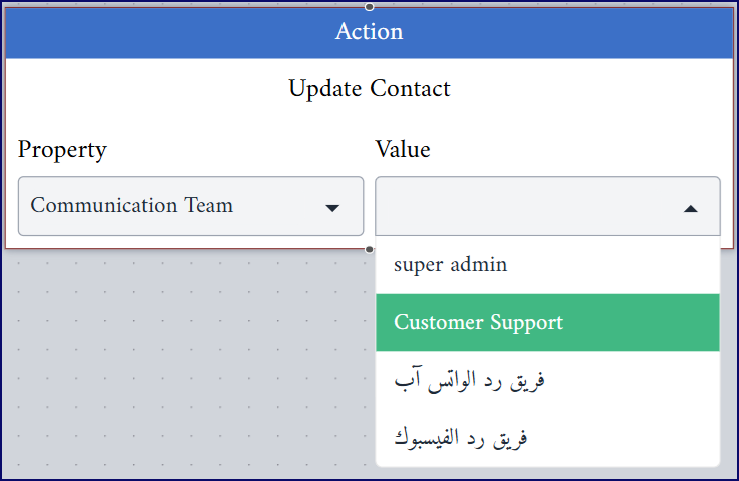
- In the "Property" field, select "Communication Team".
- In the "Value" field, choose the specific team (e.g., "Customer Support") from the list.
Case 2:
However, you may need to assign the received message to a specific user and set them as the contact owner.
{info} A contact owner is the specific person responsible for managing a contact and all communication related to that contact such as (responding to messages, following up on inquiries and others).
- In the "Property" field, select "Owner".
- In the "Value" field, choose the individual’s name from the list.
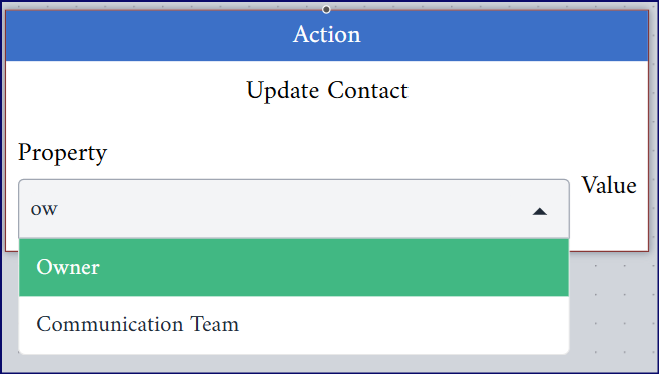
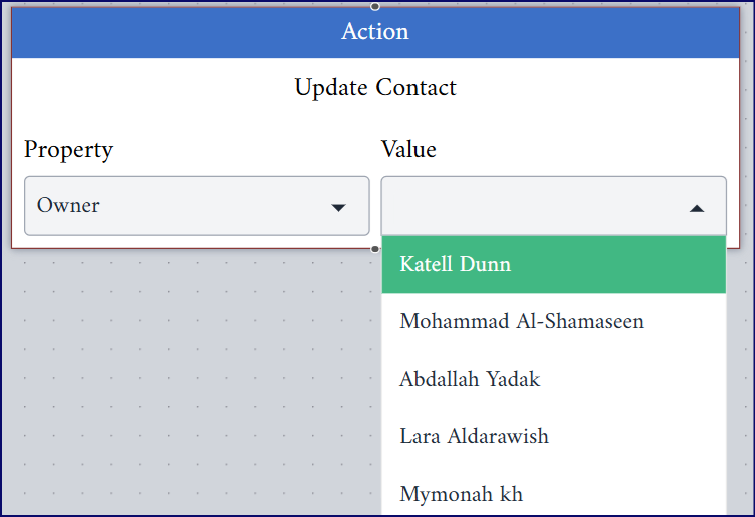
This ensures that the selected person becomes the designated owner of the contact and is responsible for handling the message.
{info} You can add, remove, or edit users and teams from the Settings section. From the left-hand menu, expand the "Users" option, then select either "Users" or "Teams", depending on what you want to manage.