Introduction
This guide will help you find and activate the perfect plan for your business, whether you're just starting out or running at scale.
Overview
We offer four flexible plans designed to meet different business needs:
- Free Plan: Start for free with basic features
- Starter Plan: Essential features for growing businesses
- Business Plan: Comprehensive solution for established businesses
- Enterprise Plan: Custom solutions for large organizations
Step-by-Step Upgrade Guide
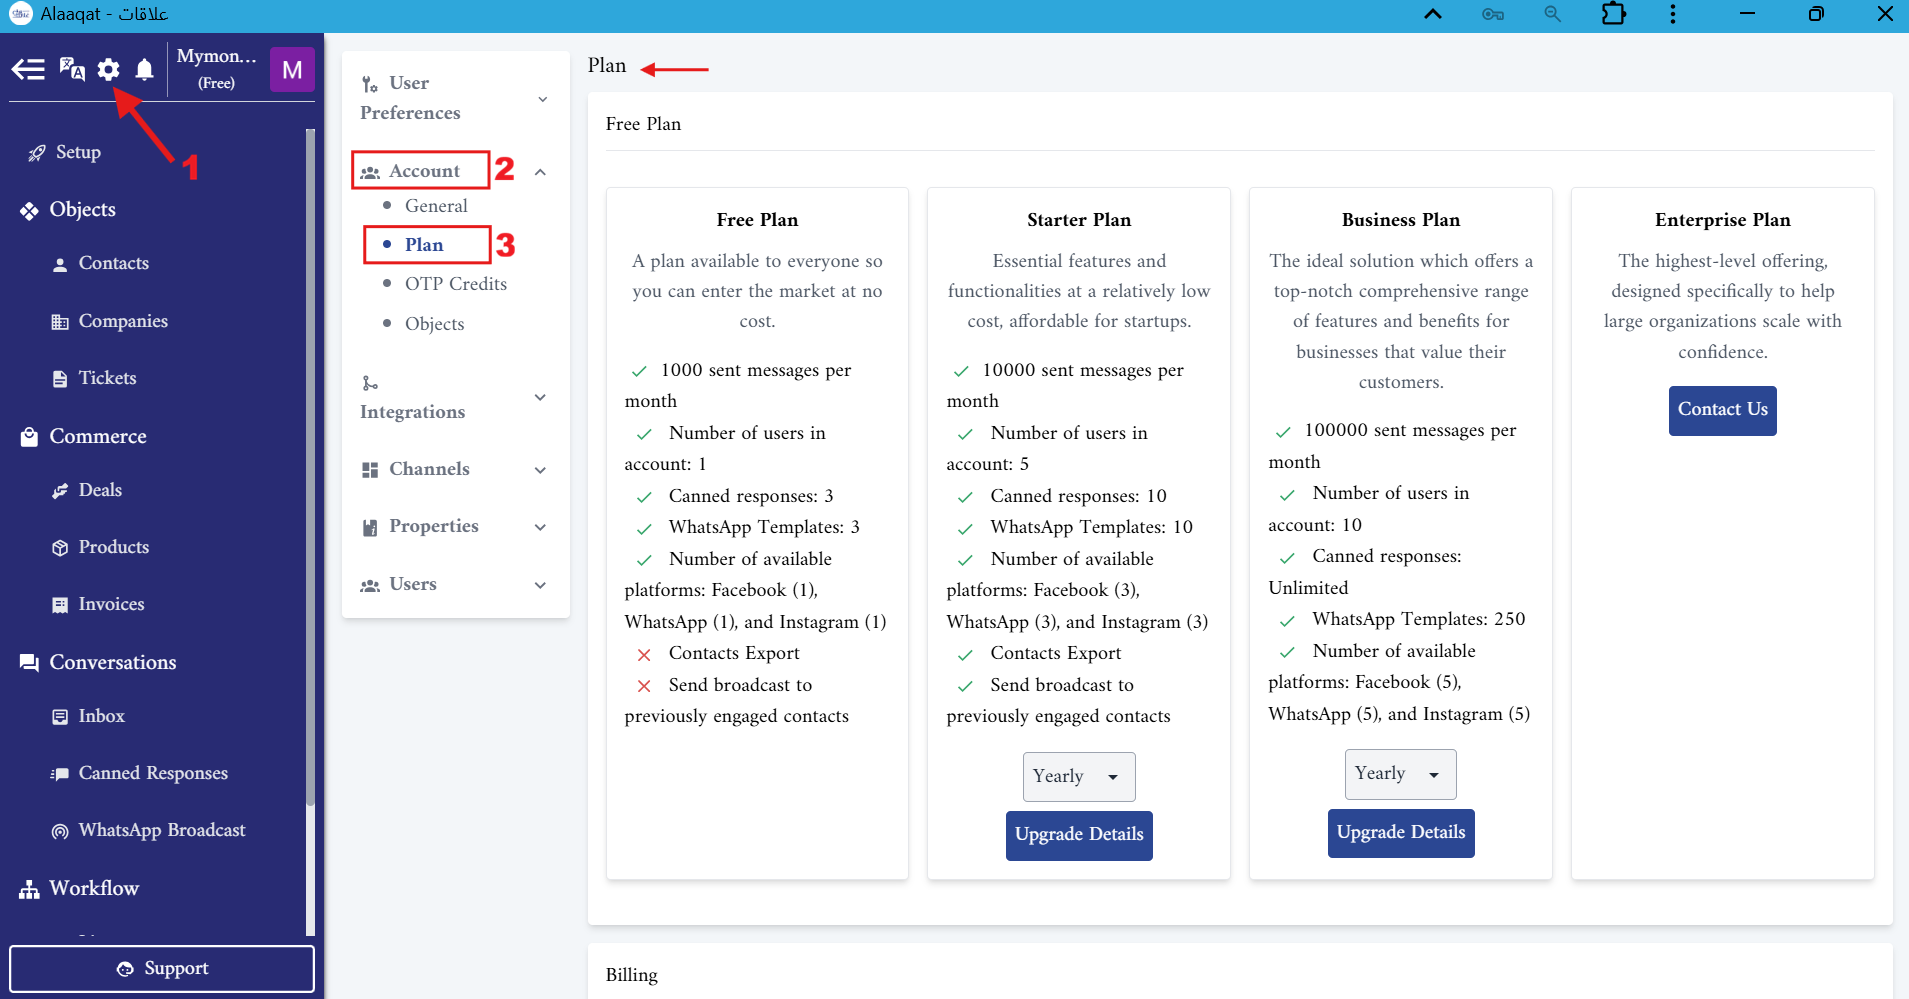
Step 1: Access Your Account Settings
- Log in to your account.
- Click on Settings (top left).
- Click "Account" from the menu to expand its options.
- Click "Plan".
Step 2: Review Available Plans
On the Plan page, you’ll see your current plan, along with pricing cards for the available plans you can upgrade to:
| Plan | Monthly Messages | Users | Key Features |
|---|---|---|---|
| Free | 1,000 | 1 | Basic templates & 3 platforms |
| Starter | 10,000 | 5 | Contact export, broadcasts enabled |
| Business | 100,000 | 10 | Unlimited responses, 250 templates |
| Enterprise | Custom | Unlimited | Full features, dedicated support |
Step 3: Select Your Desired Plan
- Review the features in each plan card.
- Identify which plan meets your business needs.
Step 4: Choose Your Billing Cycle
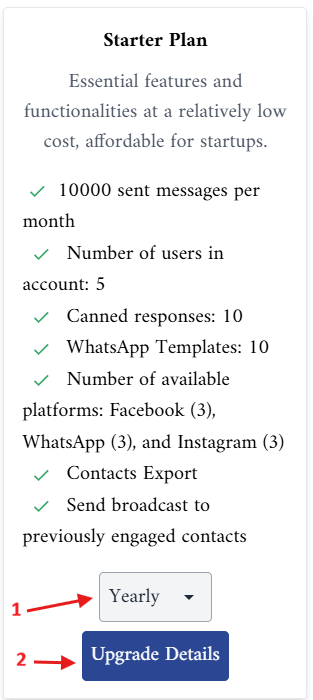
- Click the drop down to select your preferred billing frequency:
- Monthly: Pay per month (more flexibility).
- Yearly: Save with annual billing (recommended for 20%+ savings).
- Click the "Upgrade Details" button on your chosen plan.
Note: Enterprise plan users should click "Contact Us" for custom pricing.
Step 5: Review & Confirm Upgrade
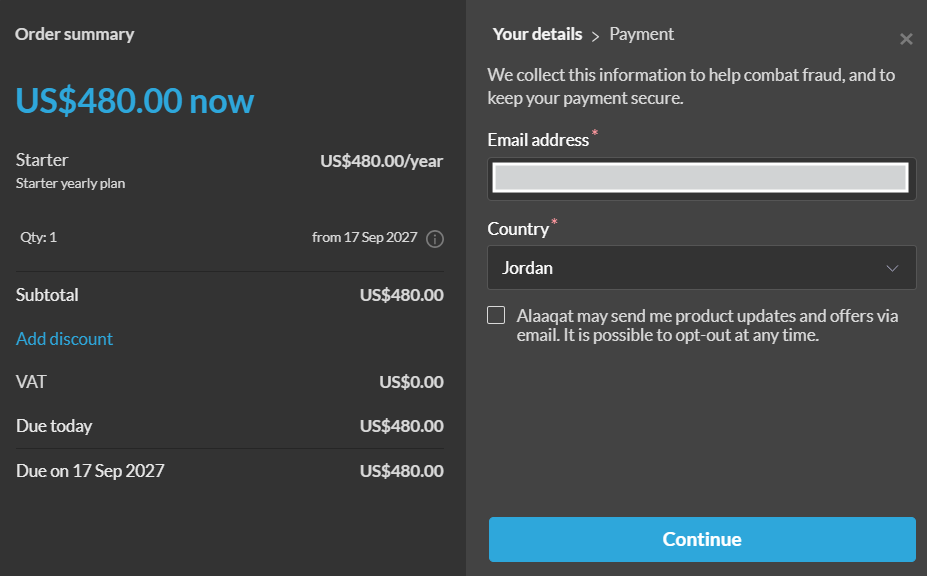
- Verify the plan details:
- User account Email
- Monthly/annual cost
- Available features
- Check if you want to receive product updates and offers.
- Click "Continue”.
Step 6: Complete Payment
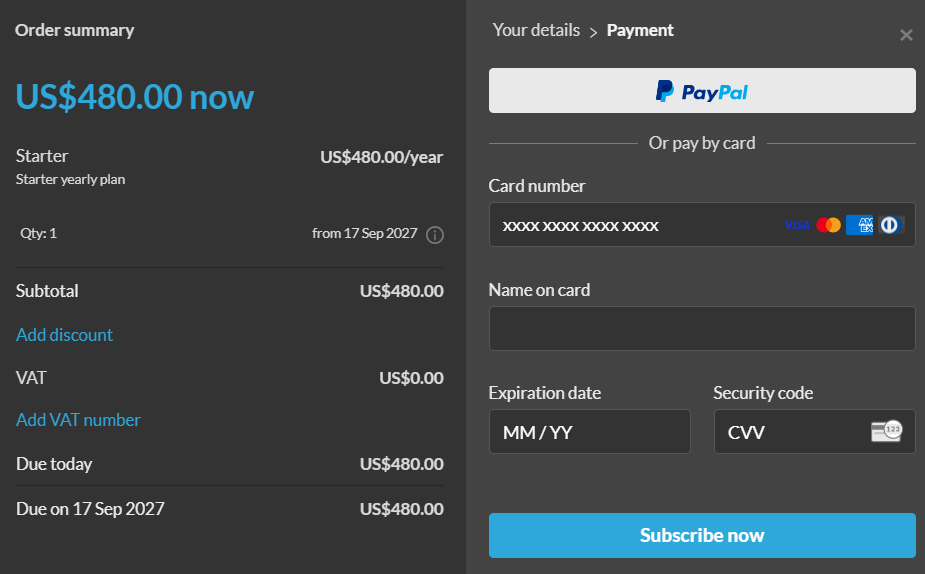
- Select your payment method:
- Credit/Debit Card
- PayPal
- Enter your billing information.
- Review the billing summary.
- Click "Subscribe now".
Step 7: Confirmation
- You'll receive an immediate confirmation message.
- Check your email for:
- Invoice
- Receipt
- Upgrade confirmation
- Your new plan features are now active immediately.
Billing Section
View Your Billing History
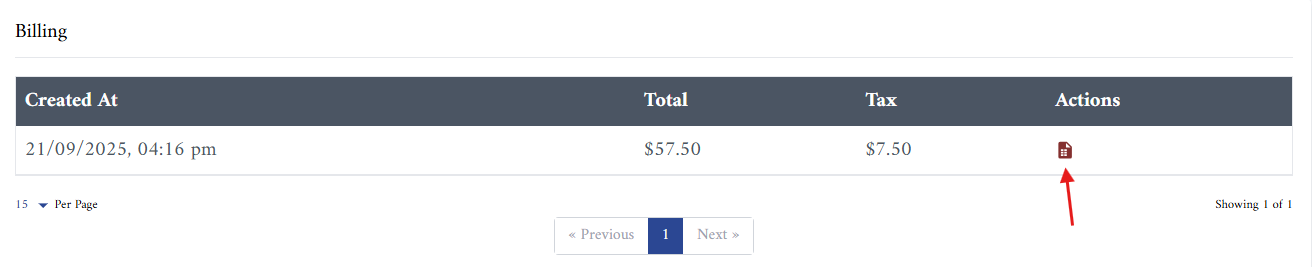
- In the Account → Plan section, scroll down to "Billing"
- View all transactions in the table:
- Created At: Date of transaction
- Total: Amount paid
- Tax:Tax applied
- Actions: Download invoice or view details
Manage Your Billing
- Click on any billing entry to view full invoice details.
- Download receipts for your records.
- Contact support if you need any help.
FAQ | Frequently Asked Questions
Q: Can I upgrade immediately?
A: Yes! Your new plan becomes active immediately after payment processing.
Q: What happens to my data when I upgrade?
A: All your data remains intact. You'll have access to all new features right away.
Q: Can I change my billing cycle?
A: Yes. You can switch from a monthly to an annual plan directly from the Plan page.
To switch from annual to monthly, you’ll need to cancel your current subscription and subscribe to the monthly plan.
Q: Can I downgrade my plan?
A: To downgrade your plan, please contact our support team.
For more details refer to the Terms and conditions