- Introduction
- Requirements
- Creating a deal
- The deal stages
- Moving a deal to another stage
- Customising the deal stages
- Owner and team
- Points to keep in mind
Introduction
A deal is a sales opportunity: a client who might buy, how much they might spend, and how far the sale has gone. Without deals, "we are talking to them" is all your team knows. A promising client goes quiet and nobody notices, and nobody can say how much business is in progress.
Each deal has an amount and a stage, and is linked to the contacts, companies and tickets it concerns. From the deals list you can see how many deals sit at each stage and who follows each one; from a contact's page you can see every deal that client is part of.
This document explains how to create deals, how to move them through the stages, and how to adapt the stages to the way your business sells.
Requirements
| Requirement | Detail |
|---|---|
| Object | Deals must be turned on. See Objects. |
| Permissions | View All Deals, View Team's Deals or View User's Deals to see deals, and View Deal Details to open any deal. Create New Deal to add one, Edit Deal to change one or to link it to other records, and Delete Deal to delete one. Customising the stages needs Edit Custom Field. |
Creating a deal
From the deals list
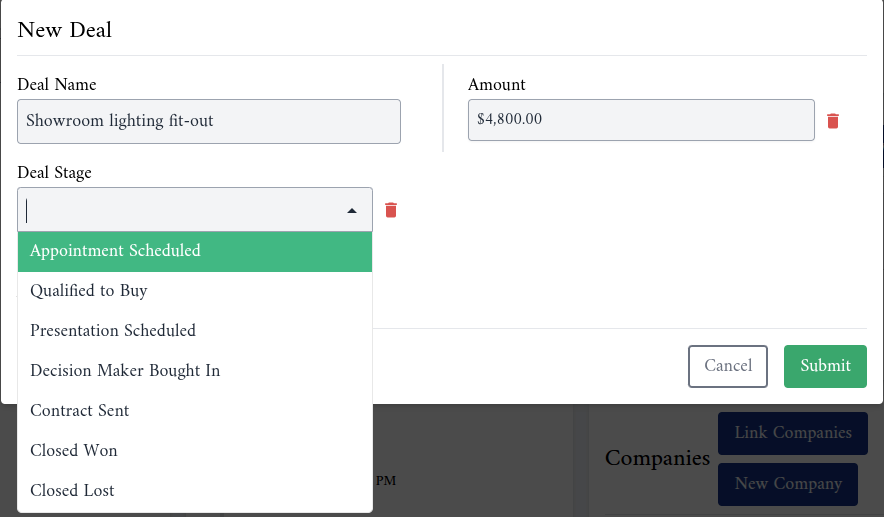
- Go to Commerce > Deals and click New Deal.
- Fill in Deal Name. It is required and needs at least 3 characters.
- Fill in the Amount and choose the Deal Stage.
- To fill in another property, such as Close Date or Deal Owner, choose it under Add Property.
- Click Submit.
From a contact, a company or a ticket
Open the record and find the Deals card in the Associations tab:
- New Deal opens the same form, and the deal is linked to the record as soon as you submit it.
- Link Deals links a deal that already exists.
- The broken-link icon on a deal removes the link. The deal itself is not deleted.
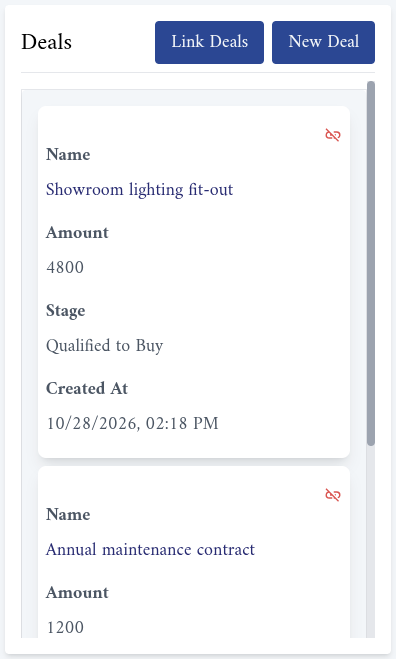
Linking and unlinking update the count properties on both records, such as Deals Count on the contact.
The deal stages
A new account offers these stages, in this order:
| Stage | Typical use |
|---|---|
| Appointment Scheduled | A first meeting or call with the client is booked. |
| Qualified to Buy | The client has the need and the means to buy. |
| Presentation Scheduled | You are about to present your offer. |
| Decision Maker Bought In | The person who signs is convinced. |
| Contract Sent | The contract or the quote is waiting for the client's signature. |
| Closed Won | The client bought. |
| Closed Lost | The client decided not to buy. |
If your sales don't follow these steps, change them; see Customising the deal stages.
Moving a deal to another stage
- Open the deal from the deals list, or from the Deals card of a linked contact.
- In the Details card, click the pencil next to Deal Stage and choose the new stage.
- Click Save.
To see every deal at one stage, pick it in the All Stages list above the deals table.
Changing the stage changes nothing else. When a deal closes, fill in Close Date and Closed Won Reason or Closed Lost Reason yourself: the reasons you record are what tells you later why deals are won or lost.
Customising the deal stages
The stages are the options of the Deal Stage property, one of the properties Alaaqat creates for deals. You change them like the options of any single select property.
- Go to Settings > Properties > Deals.
- Find Deal Stage, for example by searching for "stage", and click the pencil next to it.
- Click Next. The Options list shows one entry per stage.
- Make your changes:
- To rename a stage, change its Value. The globe icon in the field lets you enter the name in each language, so that each team member sees it in the language they use Alaaqat in.
- To add a stage, click Add New Option and type its value. New stages are added at the end of the list.
- To remove a stage, click the bin icon next to it.
- Click Save.
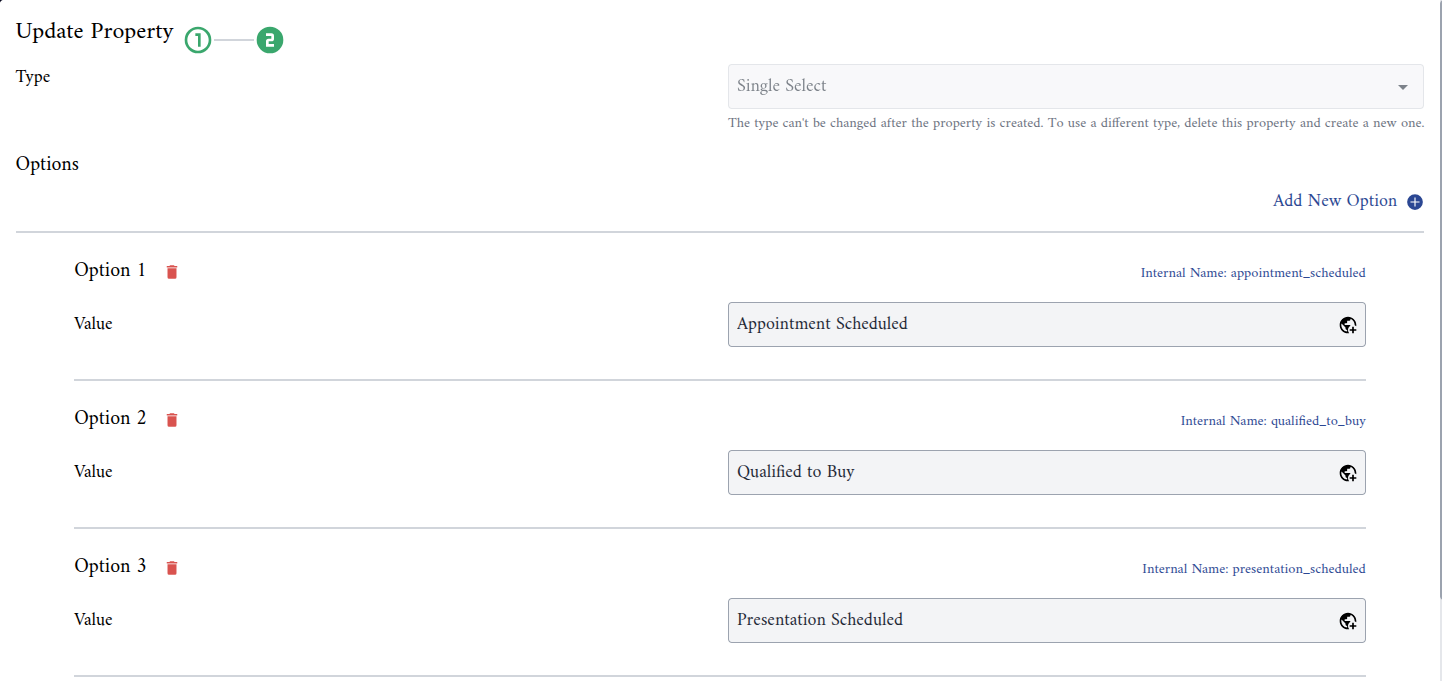
The change applies to the whole account at once.
{warning} Removing a stage doesn't move the deals that are in it. They keep a stage that no longer exists, and show no stage at all. Before you remove a stage, pick it in All Stages on the deals list and move its deals to another stage.
Points to keep in mind when you change the stages:
- Renaming is safe. Each stage keeps its Internal Name when you rename it, so the deals in it show the new name.
- The internal name is fixed once saved. When you add a stage, its internal name is made from its English value. You can change it before you save by clicking it; after that, it can't change. Integrations that use the API refer to stages by their internal name.
- At least one stage must remain.
- The stages can't be reordered. New stages are always added at the end, so plan the list before you add to it.
- The same steps work for every predefined single select property: the contact's Relation Stage, and the ticket's Status, Category, Priority and Resolution.
Owner and team
Deal Owner is the team member responsible for the deal, and Team is the team that follows it.
Deal Owner and Team also decide who can see the deal. A team member with View All Deals sees every deal. Without it, View Team's Deals gives access to the deals whose Team is one of their teams, and View User's Deals to the deals they own.
Points to keep in mind
- Deal Name needs at least 3 characters.
- A deal can be linked to several contacts, and a contact to several deals.
- The form remembers the fields you add with Add Property and remove with the bin icon, in this browser.