- Introduction
- Step 1: Sign up
- Step 2: Verify your email
- Step 3: Create your account
- Step 4: Work through the setup checklist
- Getting help
- Points to keep in mind
Introduction
An empty account answers nobody. Until a WhatsApp number or a Facebook page is connected, no client message reaches Alaaqat. Until your team is invited, one person answers every client. And until your contacts and templates are in place, every reply starts from zero.
This document takes you from signing up to an account that is ready for real work. It covers signing up, verifying your email, creating your account, and the Setup checklist that shows what is left to do. It ends with how to reach the Alaaqat support team when you are stuck.
Step 1: Sign up
Open the Alaaqat login page and click Create New Account. There are two ways to sign up:
- With your email. Fill in First Name, Last Name, Email, Phone Number, Password and Password Confirmation. The password must be at least 12 characters long and contain at least one number and one letter. Tick the box to agree to the Terms of Use and the Privacy Policy, then click Sign up.
- With Google. Click Sign up with Google and choose your Google account. Alaaqat takes your name and email address from Google.
{info} Were you invited to join someone else's account? Don't sign up here. Open the invitation email and follow its link instead; see Accepting an invitation.
Step 2: Verify your email
If you signed up with your email, Alaaqat sends a link to that address. Click the link to confirm that the address is yours.
Until you do, you can't open any account. Alaaqat shows your accounts page with this message: Please click on the link just sent to your email inbox to verify your email and continue to the application.
- If the email doesn't arrive, check your spam folder, then click Resend next to the message. You can resend once every 5 minutes.
- If the link has expired, click Resend to get a new one.
If you signed up with Google, your email is already verified and you skip this step.
Step 3: Create your account
Your login is you. Your account is your business: it holds your channels, your contacts, your conversations and your team. A short wizard creates the account:
- What industry are you in? Pick the industry closest to your business, then click Next.
- What do you want to call your account? Type your business name. It must be at least 3 characters long. Click Next.
- Contact Number. This step only appears when Alaaqat has no phone number for you yet, for example when you signed up with Google. The number is used for account verification and support.
- Plan. This step only appears when you chose a paid plan on the pricing page before signing up. Complete the payment, or click Or continue with the free plan.
You are now the owner of the account. You are also a member of its super admin team, which can do everything in the account. See Teams and Permissions.
Step 4: Work through the setup checklist
After the wizard, Alaaqat opens the Setup page. It lists the things that turn an empty account into a working one, and it shows how many are done.
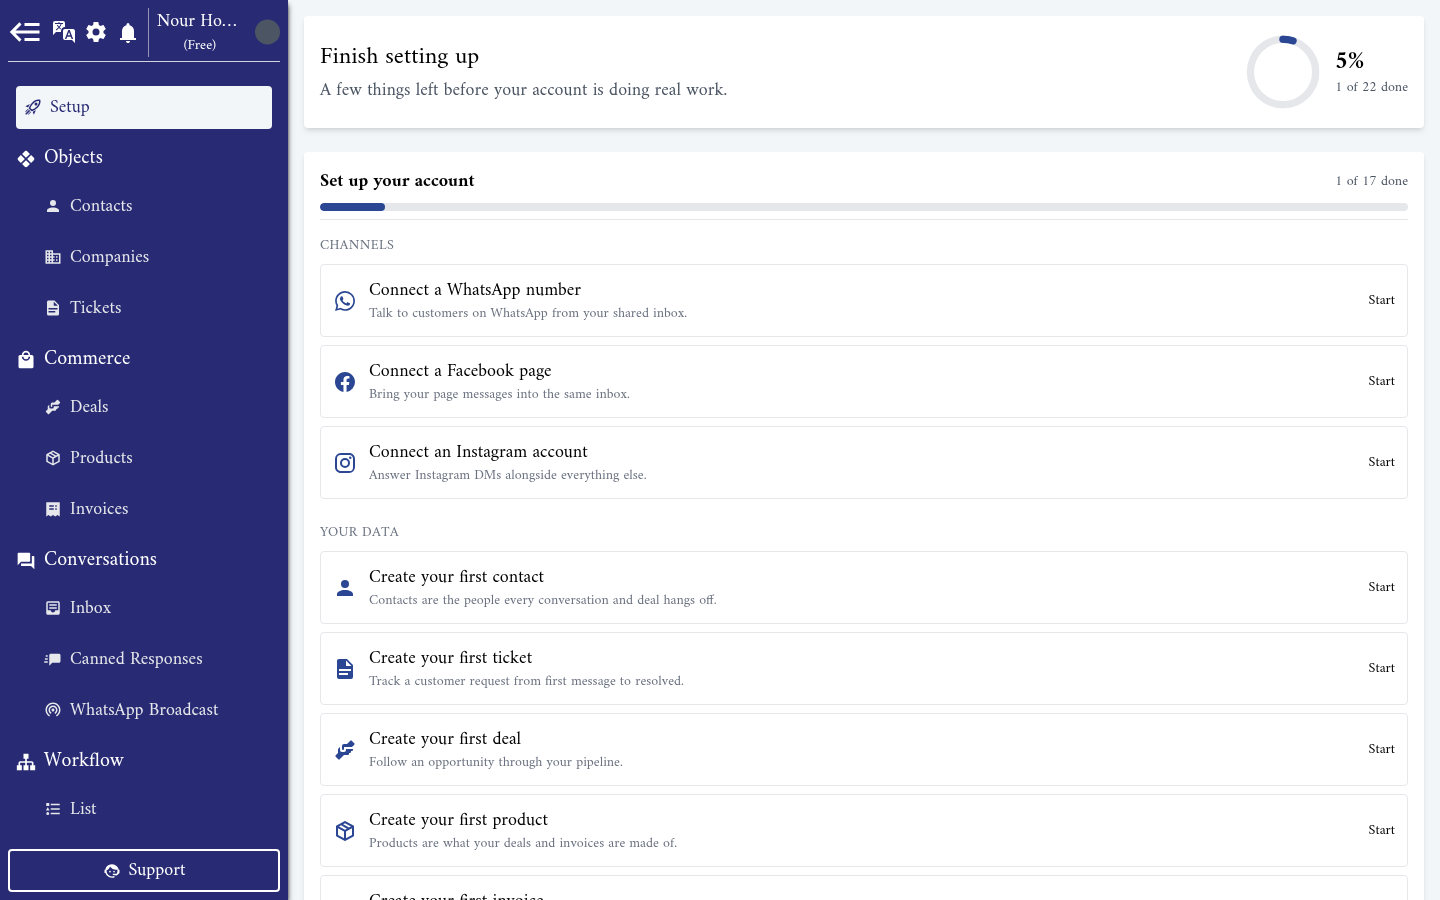
The list has two sections:
| Section | Group | Items |
|---|---|---|
| Set up your account | Channels | Connect a WhatsApp number, a Facebook page and an Instagram account. |
| Your data | Create your first contact, ticket, deal, product and invoice. | |
| Account & team | Complete your account profile (a logo and an address), invite your first teammate, and upgrade your plan. | |
| Conversations | Create your first canned response and a WhatsApp message template, then create and send your first broadcast. | |
| Make it yours | Create your first workflow and add your first custom property. | |
| Set up your profile | Your profile | Add a picture, save your first view, set your notification preferences, enable two-factor authentication, and choose your main page. |
How the checklist works:
- Click an item to start a short tour. The tour points at the menu entry that leads to the right page, then at the button to press. Click your own way there, and the tour follows you. Or press Next to let the tour take you.
- Items tick themselves. Alaaqat checks what already exists in the account. You don't need to mark anything as done. Click Show completed in a group to see the items that are done.
- Account items are shared, profile items are personal. When one team member connects WhatsApp, that item is done for everyone. Set up your profile is different for each team member.
- Each team member sees only what they can do. An item needs the same permission as the task itself. For example, Invite your first teammate only shows to team members with the Invite New User permission. Items about an object you turned off are hidden too; see Objects.
Setup is the page you land on until you choose another one. To change it, go to Settings > User Preferences > General and pick a Main Page. When every item is done, Setup leaves the menu.
Getting help
The Support button is at the bottom of the menu, on every page. It opens a form that goes straight to the Alaaqat support team.
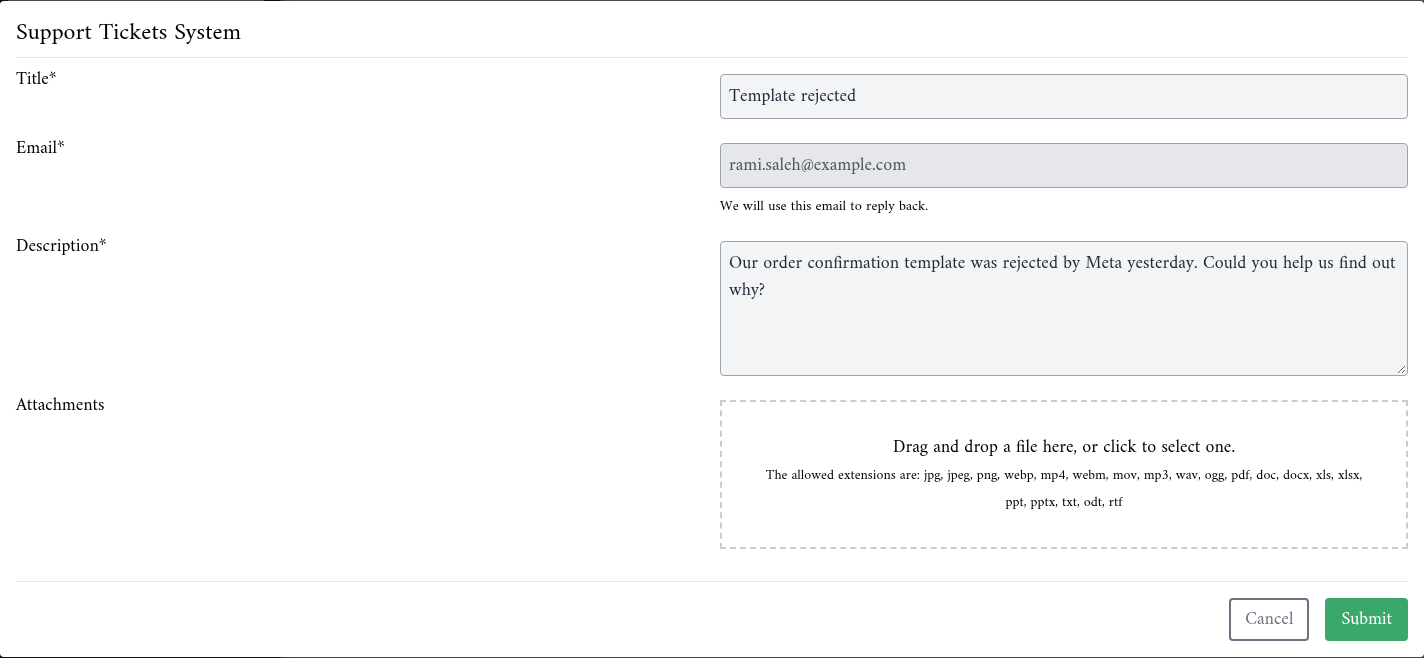
| Field | What to enter |
|---|---|
| Title | A short summary of the problem, up to 25 characters. |
| Your login email. You can't change it here. The support team replies to this address. | |
| Description | What happened and what you expected, up to 255 characters. |
| Attachments | Up to 5 files, each up to 25 MB. A screenshot of the problem helps most. |
Click Submit. Alaaqat shows We have received your message and will reply back soon.
The form also tells the support team which account you are in and which page you were on. Open it from the page where the problem happens. You don't need to describe where you were.
Points to keep in mind
- Connect a channel first. Until a WhatsApp number, a Facebook page or an Instagram account is connected, no client message reaches your inbox. See the integration guides for WhatsApp, Facebook and Instagram.
- Invite your team before clients start writing. Each new member needs a team, and the team decides what they can see. See Users and Teams and Permissions.
- The support form takes images, PDF files and Word documents. The upload box lists more file types, but other files are refused when you submit. Send JPG, PNG, GIF, PDF, DOC or DOCX files.
- The owner is the only person who can delete the account. Hand the account to someone else before you leave the business; see The account owner.