- Introduction
- Requirements
- How a record page is laid out
- Changing a record's details
- Adding a note
- Editing or deleting a note
- The activity history
- Keeping files on a record
- Renaming and deleting files and folders
- Points to keep in mind
Introduction
A client calls back a week later and gets a different agent. If what was agreed on the first call lives only in the first agent's head, the client has to explain everything again, and the second agent may promise something else. The same goes for the signed contract sitting in someone's inbox, or the price that was changed without anyone knowing who changed it.
Every record in Alaaqat, whether a contact, a company, a ticket, a deal, a product or an invoice, has its own page that keeps all of this in one place: its details, the notes your team writes about it, a history of every change and who made it, and the files that belong to it.
This document explains how a record page is laid out, how to keep notes, how to read the activity history, and how to keep files and folders on a record. To link a record to other records from the same page, see Linking Records.
Requirements
| Requirement | Detail |
|---|---|
| Object | The object must be turned on. See Objects. |
| Seeing the page | A permission that lets you open the record, for example View Contact Details, or View All Contacts, View Team Contacts or View User's Contacts for the contacts that permission covers. The activity history shows to everyone who can open the record. |
| Notes | Each object has four note permissions. For deals, for example: View All Notes on Deal to see the notes, Add Note to Deal, Edit Note on Deal and Delete Note from Deal. |
| Files | The object's edit permission, for example Edit Deal. You need it even to see the files. |
| Plan | The number of notes an account can keep for each object, and the storage for all its files, depend on the plan. See the plans on the pricing page. |
Permissions are given to teams; see Teams and Permissions.
How a record page is laid out
Click a record's name in any list to open its page. The page below is a deal's; every object's page is laid out the same way.
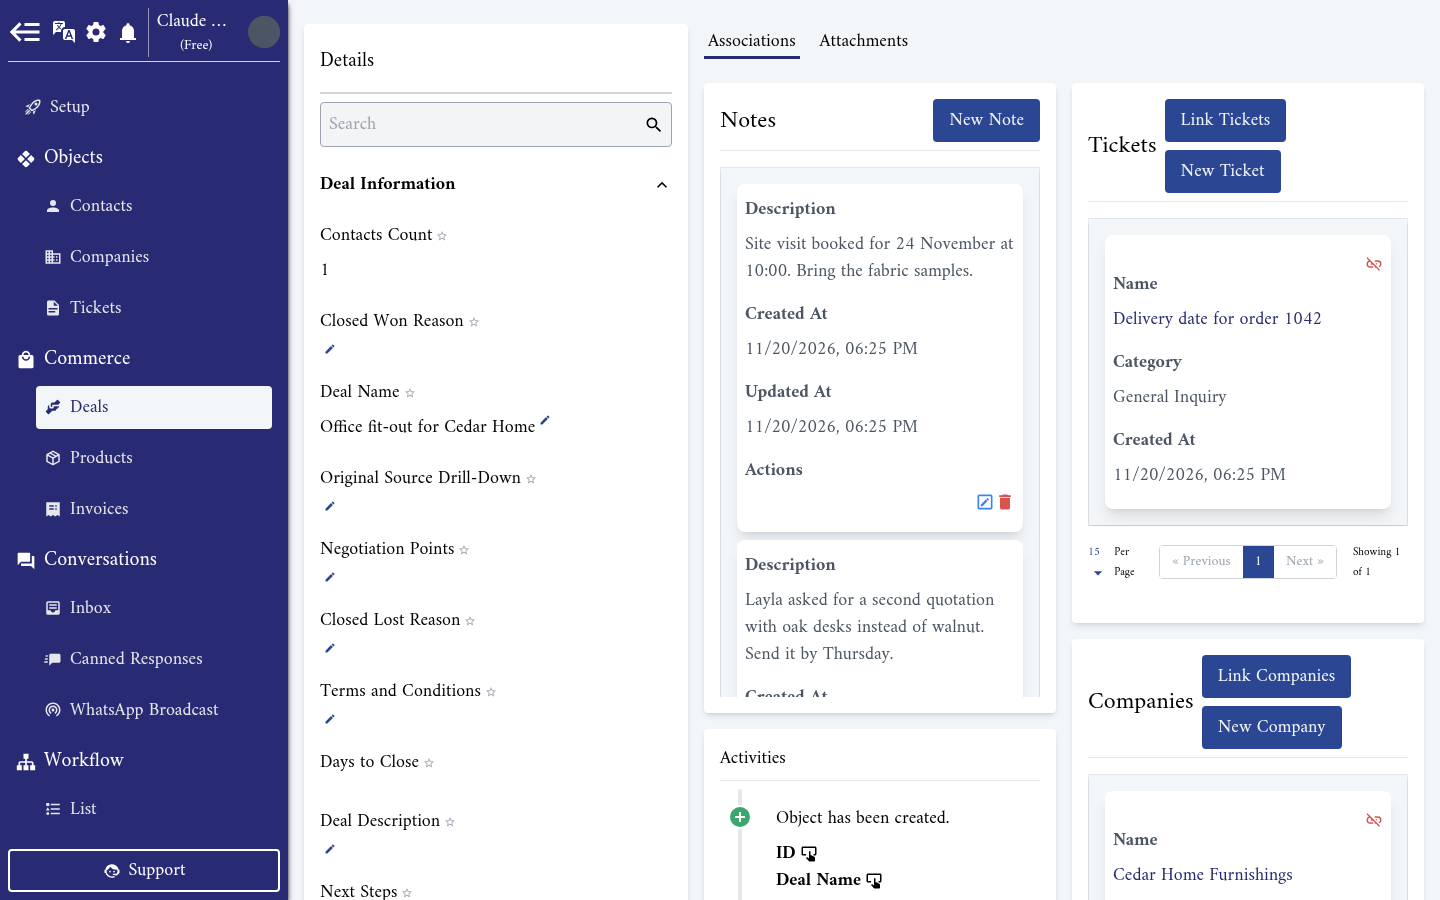
- On the left, the Details card lists the record's properties by group.
- On the right, the Associations tab holds the Notes card, the Activities card, and a card for each of the other objects, such as Contacts, Tickets and Companies, with the records linked to this one. On a contact's page, the contact's conversations appear here too.
- The Attachments tab, next to Associations, holds the record's files and folders.
Changing a record's details
In the Details card, type in Search to find a property quickly, or open its group. Click the pencil next to a value, change it, then click Save at the bottom of the card.
A property without a pencil is filled in by Alaaqat, such as Contacts Count on a deal, or your permissions don't let you edit the record. Every change you save appears in the activity history.
Adding a note
A note is free text that your team keeps on a record: what the client asked for, what was promised, what to do next. Clients never see notes.
Step 1: Open the note form
In the Associations tab, find the Notes card and click New Note.
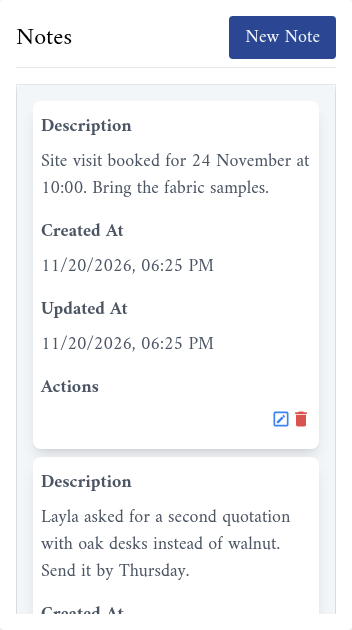
The card lists the record's notes, the last one changed first. Each note shows its Description, Created At and Updated At.
Step 2: Write the note and submit
Type the note in Description, then click Submit.
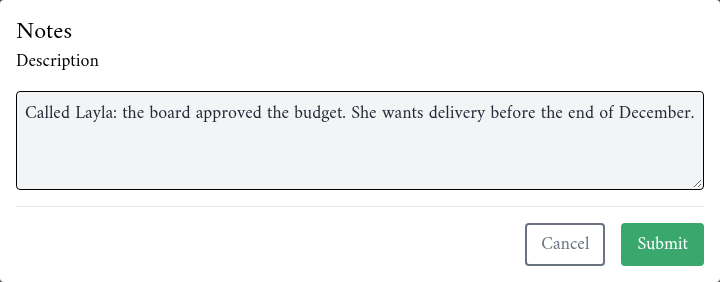
The note appears at the top of the card. Write it so that a colleague who has never spoken to the client understands it: what happened, what was agreed, and by when.
{info} Your plan limits how many notes the account can keep for each object, counted across all its records: all the notes on all your deals, for example. When the account reaches the limit, Alaaqat offers to upgrade the plan instead of saving the note. Deleting notes you no longer need frees room for new ones.
Editing or deleting a note
Under Actions on each note:
- The pencil opens the note in the same form. Change the text and click Submit. The note's Updated At changes.
- The bin deletes the note after you confirm. A deleted note can't be brought back.
A note doesn't show who wrote it, and any team member with the edit or delete note permission can change or delete any note, not only their own. If the author matters, write your name in the note.
The activity history
The Activities card, under Notes, records every change to the record's properties, so you can always answer "who changed this, and when?"
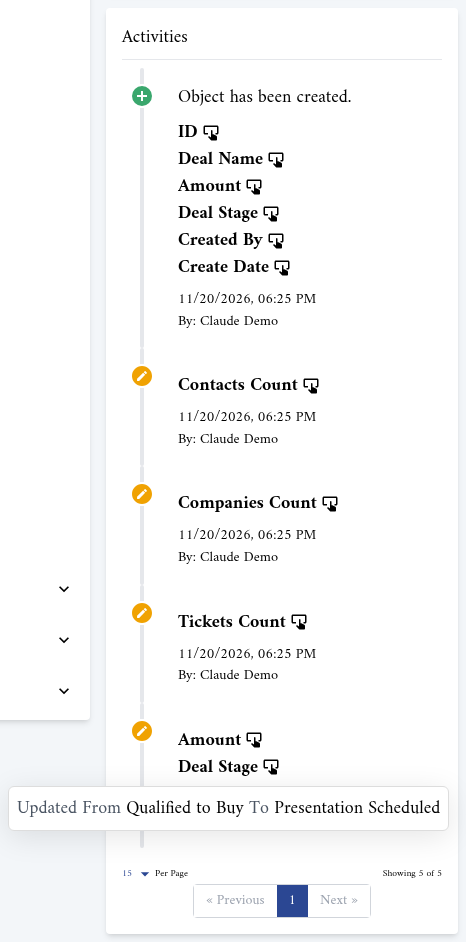
- The first entry, "Object has been created.", lists the properties the record was created with.
- Each later entry lists the properties changed at that moment. Click a property's name to see the change, for example "Updated From Qualified to Buy To Presentation Scheduled".
- Under each entry are the date and time, and who made the change: the team member's name, or Alaaqat for a change that no team member made.
The entries are listed from the oldest to the newest, so the latest changes are at the bottom of the card, on its last page. Change how many entries a page shows with Per Page.
What the history records:
- Changes made on the record page, in a list's bulk edit, or through the API.
- Links to other records, as a change of the matching count property, such as Contacts Count when you link a contact to a deal.
What it doesn't record: notes and files. Adding, editing or deleting them leaves no entry. Entries can't be edited or deleted.
Keeping files on a record
The Attachments tab keeps the files that belong to a record, such as a quotation, a signed contract or a photo of a damaged item, in folders you name yourself.
Step 1: Open the Attachments tab
On the record page, click Attachments, next to Associations.
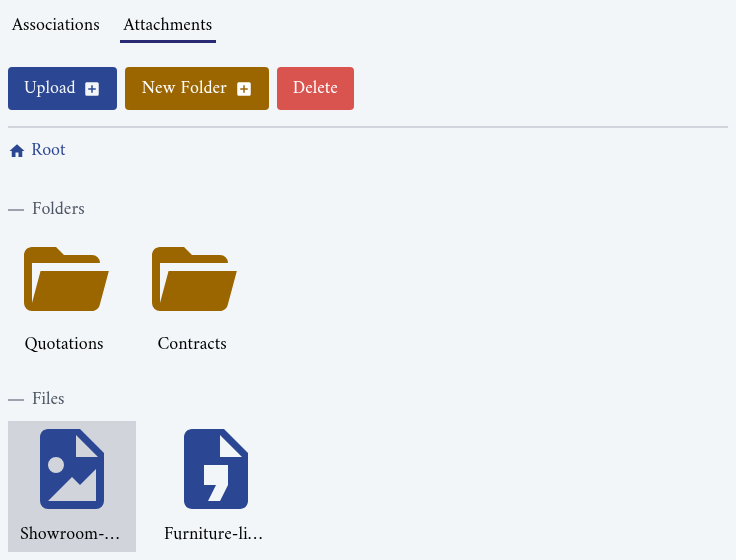
The tab shows the folders, then the files, of the folder that is open. Root, with the house icon, is the record's top level. When you open a folder, its name is added after Root; click Root or a folder's name to go back up.
Step 2: Create a folder
You can keep files at the top level, but folders help once a record holds more than a few files.
- Open the folder you want the new folder in, or stay at Root.
- Click New Folder. A folder named "New Folder" appears right away.
- Click its name, type the name you want, then click anywhere else to save it.
Double-click a folder to open it. Two folders in the same place can't have the same name.
Step 3: Upload the files
- Open the folder the files belong in.
- Click Upload, and choose one or more files.
The files appear under Files in the open folder.
| Rule | Detail |
|---|---|
| File types | Images, videos, text files (such as txt and csv), PDF, Word, Excel and PowerPoint files. |
| Size | Up to 10 MB per file. |
| Names | Two files in the same folder can't have the same name. Uploading a file whose name is taken is refused with a message such as "The Quotation-Q-2291.pdf has already been taken." Rename the file on your computer and upload it again. |
| Storage | All the files of all your records count towards your plan's storage. When it is full, Alaaqat offers to upgrade the plan instead of uploading. |
Renaming and deleting files and folders
- Select a file or a folder by clicking its icon; it turns grey. Hold Ctrl and click to select several. Click an empty part of the tab to clear the selection.
- Rename a file or a folder by clicking its name, typing the new name, and clicking anywhere else. A name can't contain a slash.
- Delete what you selected with Delete.
{warning} Delete asks for no confirmation, and deleting a folder also deletes every folder and file inside it. Nothing deleted can be brought back. Check the selection before you click.
Points to keep in mind
- Files can't be opened or downloaded from the record page. The tab keeps them and shows their names, but clicking a file only selects it. Keep your own copy of every file you upload.
- Files can't be moved between folders. To move one, upload it again in the right folder and delete the old copy.
- Deleting a record deletes its notes. See Bulk Edit and Delete.
- Merging contacts moves the removed contact's notes to the kept contact, but not its files or its activity history. See Merging two contacts.
- An integration can manage notes through the API, and follow them through webhooks. See the API reference and Webhooks.